♥Copyright Protected♥

MyFreeCopyright.com Registered & Protected

♥ Forever Me ♥

♥ MY FORUM ♥

♥ CT's I Design For♥


♥Proud Member♥

♥I am Licensed with...♥

Illustration store PicsForDesign.com

♥Special Licenses ♥

♥ CU License ♥

♥ Follow Me ♥

♥Free Fonts♥

♥Show Some Love♥


SUPPLIES NEEDED
TUBE OF CHOICE: I used the awesome artwork of Misticheskaya. 
You must have a license to use his art.
You can find this art and get your license HERE.

SCRAPKIT: Emo Girlz Rock Mix and Match by Designs by Sarah
Emo Girlz Rock Collab by Pimp'd Designz.
This is 2 PTU kits. You can find them HERE.

FONT OF CHOICE: I used Ashley

I used Photoshop for this tut.
♥♥♥♥♥♥♥
Because I am using two kits combined,
when you see: pd-***
That means the element is from Pimp'd Designz kit.
sb-*** is from Designs by Sarah kit.
The whole idea of Collab kits is to mix and match elements
from all the kits in the Collab.
So go nuts!
Have FUN!

Let's have some fun!
Open a canvas, transparent background, 650x650 pixels.

Open pd-frame04.
Place in center of canvas.
Open sb-frame4.
Center on top of pd-frame04.
Ok. Now we're gonna do some work behind these frames.
Open pd-paper4.
Center behind both frames.
Set the Opacity to 80%.
(You'll find this in the upper right corner of your layer palette.)
Grab your eraser and erase paper around the outside of pd-frame04.
Open pd-wire.
Center this on top of the paper.
Open pd-print02 and pd-glitter02.
Center wire and place glitter wherever you like.

Open your tube and place where you like.
I added a drop shadow to this layer.

On top of the frames
I used these elements:
sb-frame3
pd-star02
pd-swirl02
sb-wings2
sb-wordart3
sb-bow1
sb-bow2
sb-skull1
sb-skull2
sb-star2
sb-wordart2
sb-ribbon3

Place your elements wherever you like.
I added an outerglow to the elements.
To sb-wordart2:
I also added Stroke, 2 outside, bright teal.

When you're happy with your sig,
Make a new layer.
Type your name in the font of your choice.
I used the eye dropper tool
and clicked on my tube's pink clothing to select the color.
I then added Stroke, Outside, 3, black
and an Outerglow.

MOST IMPORTANT!!
You must now do this:
Put the artist's name, website, and your license number
of the tube you used on the siggy!!
Add your name (ie: Designed by Your Name) behind this info.
Make sure this info is legible and clearly seen.

Save as PSD to maintain layers.
Then save as PNG, remembering to use a number behind your sig title.
YOU'RE DONE!!
I hope you had fun with this tut!
HUGS!

*This tut was created by me, Redneck Tuts by Savage. 
Any resemblance  to any other is purely coincidental.*
Artist: ©Misticheskaya www.picsfordesign.com PFD_Savage


Sunday, April 17, 2011


SUPPLIES NEEDED

TUBE OF CHOICE: I used the fabulous artwork of Lorenzo Di Mauro. 
The tube I used came with a close up.
You must obtain a license to use his art.
You can find Lorenzo's art and get your license HERE.


SCRAPKIT: Pinks for Girls by MistressV Signature Collections.
This is a FTU kit. You can find it HERE.

FONT OF CHOICE: I used York Script ES.

I used Photoshop for this tut.

♥♥♥♥♥♥♥

We'll be playing with Blending Options and
we'll be using the Eraser for the text effect.
If you don't want to animate
Skip the parts marked **BLUE**.

Let's have some fun!
Open a canvas, white background, 700x700 pixels.
Your background can be transparent if you are not animating.

Open sc-frame2.
Center on canvas.
Open sc-paper1, place under frame2.
Highlight frame2 layer.
Grab your magic wand and click inside frame2.
Highlight paper1 layer.
Go to Select in your toolbar.
Click and then click Inverse.
Hit Delete on your keyboard.
Go back to Select and click Deselect.

Open sc-frame3.
Place over to the left of your sig.
Open sc-paper3, place behind frame3.
Set the Opacity to 75%.
This is in the top right corner of your layer palette.
Highlight frame3 layer.
Grab your magic wand.
Click inside frame3, while holding down the Shift key.
Both squares should have marching ants around them.
Highlight paper3 layer.
Got to Select, click Inverse.
Hit the Delete key on your keyboard.
Go back to Select and click Deselect.

These are the elements I used on top of the frames:
sc-bow1
sc-flower1
sc-heart2
sc-flower2
sc-flower3
sc-lower4
sc-butterfly2

And behind frame3 I used sc-sparkles.

Open your regular size tubes.
Place them where you like.

Now open one close up tube.
Place this behind frame3.
Highlight frame3 layer.
Grab the magic wand.
While holding the Shift key down,
Click inside both squares of frame3.
Highlight the close up tube layer.
Go to Select, click Inverse.
Hit the Delete key on your keyboard.
Back to Select, click Deselect.

Duplicate your close up tube layer.
Highlight the first layer of your close up.
Right click this layer in the layer palette.
A window will pop up.
Look for Blending Options.
Click that.
These are the settings I used:
Blending Options: Luminosity 100%
Fill Opacity: 100%
Channels: check R, G, B
Knockout: None
Check:Blend Clipped Layers as Group
and Transparency Shapes Layer.
Blend If: Gray
This Layer: 0, 255
Underlying Layer: 0, 255
Click OK.

Highlight the second close up layer.
Again, right click and choose Blending Options.
These are the settings I used:
Blending Options: Screen 100%
The rest of the settings are the same as the last step.
Click OK.

To make your next close up tube appear bigger in your siggy:
Before you open your tube,
Go to Image in your toolbar at the top of your screen.
Click Image Size in the drop down menu.
When a new window appears,
Set your image size to 600x600 pixels.

Now open your close up tube.
Place this tube behind frame2.
Position where you like.
With this layer highlighted,
Go to Image at the top of your screen.
In the drop down menu,
Click Adjustments.
Now click Hue/Saturation.
A new window pops up.
Leave the settings alone EXCEPT for Lightness.
Type in +65.
Hit OK.

Go back and highlight frame2.
Grab the magic wand and click inside the frame.
Highlight your close up tube layer.
Go to Select, click Inverse.
Hit Delete on your keyboard.
Go back to Select, click Deselect.

I placed a drop shadow on everything except:
papers
heart2
sparkles
Close up tubes

MOST IMPORTANT!!
You must now do this:
Put the artist's name, website, and your license number
of the tube you used on the siggy!!
Add your name (ie: Designed by Your Name) behind this info.
Make sure this info is legible and clearly seen.

Make a new layer on top of all layers.
Type your name.
Position it where you like.
I used Black with a Stroke, Outside, 2, color: f68fce

If you are not animating
Save like this:
To maintain the layers individually Save As PSD first.
Then rename the sig adding a number or letter
and save as PNG.
YOU'RE DONE!!

**If You Are Animating:**
**Duplicate your name and hide the first layer.
(This is in case you make a mistake, it will be easy to correct.)
Right click your second name layer.
Click Rasterize Type in the new window that pops up.

We're going to make lots of layers of your name.
You will need one layer for each letter in your name.
Plus one name layer left intact
And at least 5 layers for your first letter.
(I used 10 layers for the first letter.)
So duplicate your rasterized name that many times.
For the name Lorenzo, I ended up with 16 layers.

I relabeled my name layers.
This cuts down on confusion.
I used 10 layers for the first letter.
(You can use less. The more layers, the smoother the animation.
For the rest of this tut, we'll assume you have 10 layers.)
So I labeled these layers as:
L1
L2
L3
L4
and so on.
The final layer for the first letter, was labeled L10.

Then I renamed the rest of the name layers.
I used the name Lorenzo.
So I had 10 layers for the letter L.
Then I had one layer for each remaining letter.
Like this:
o
r
e
n
z
o
In my siggy, I ended up with 16 layers for the name.
(This does not count the hidden un-rasterized name layer.)

Ok. So you should now have one layer for every letter in your name
Plus 10 layers for the first letter in your name.
Hide all layers of your name except the first one (L1).
(Remember, we're not using the hidden un-raterized layer.)

Highlight the first name layer.
Grab your eraser.
We're working with the first letter of your name only right now.
Pretend you are writing your name by hand.
Erase this entire layer except for a small portion
where the letter would start being written naturally.
Highlight the second layer of your name.
Erase again, leaving a little more than last time, of your first letter.
Keep repeating this, for the first letter in your name,
Each time leaving a little more of the letter visible.
By the tenth layer, the entire first letter should be the only thing showing.

On to the rest of your name.
Starting with the next letter in your name,
Highlight that layer.
Leave the first and second letters of your name on this layer.
Erase the rest of the letters.
Highlight the next letter in your name.
Leave the first three letters on this layer and erase the rest.
Keep repeating this until all your letters are done.
Your last name layer will be the complete name.
So I ended up with 6 layers for “orenzo”.
All together, I now have 16 layers for my name.

**FOR ANIMATION**
Go to Windows in the toolbar.
Click Animation.
Set the time in the animation frame for .1 for the first 10 frames.
The first 10 frames will be the layers of the first letter of your name.
Show all layers of your sig in each frame
EXCEPT FOR YOUR NAME.
Frame 1: Show the whole siggy plus:
the first layer of the first letter of your name (L1).
Frame 2: Show the whole siggy plus:
the second layer of the first letter of your name (L2).
Repeat this through the last layer of your initial (L10).

Now we need more frames.
Change the settings of animation to .2 for the rest of the frames.
Frame 11: Show the whole sig plus
the first and second letters in your name.
Frame 12: Show the whole sig plus
 the first three letters in your name.
Continue this sequence until all the letters of your name show.

Add 2 more frames with your full name showing.
I ended up with 18 frames of animation.
Hit the Play button and view your animation.

If you like it, you're done!
Save as PSD.
Then under File,
Hit Save for Web and Devices.
That's it!
You're done!

I hope you had fun with this tut!
♥HUGS!♥

*This tut was created by me, Redneck Tuts by Savage. 
Any resemblance  to any other is purely coincidental.*
Artist: ©Lorenzo Di Mauro http://www.lorenzodimauro.com/ LO1080DM
Friday, April 15, 2011


SUPPLIES NEEDED
TUBE OF CHOICE: I used the fab artwork of Alfadesire. 
You must purchase a license to use this art.
You can find Alfadesire's art and get your license HERE.

SCRAPKIT: Emo Kitty by Rieka Rafita.
This is a PTU kit. You can find it HERE.
FONT OF CHOICE: I used:
BadDog for the name.
Ashley Crawford for the letters EFF.
BaaBookHMK Bold for the small letters in
Emo Friends Forever.

I used Photoshop for this tut.

♥♥♥♥♥♥♥

Let's have some fun!

Open a canvas, transparent background, 650x650 pixels.
Open RR_Paper2
Set Opacity to 50.
(This is located at the top right corner of your Layer Palette.)
Open RR_Frames2, Center.

Behind the frame I put:
RR_Wire
RR_Flower4
Resize flower to your liking and center at top of frame.

Now open your tube and place it where you like.
Behind the tube, but on top of the frame
I used these elements:
(Resize and place wherever you like!)
RR_Doodle
RR_Bag
RR_Lolipop
RR_Skull1
RR_BottleCapKeychain
RR_Bow1

On top of the tube layer
I used these elements:
RR_EmoBear
RR_Cat
RR_Skull4
RR_Button1
RR_Button2
RR_Button3
RR_Bracelet

Place a drop shadow on everything except Paper3.

Now grab a soft edged eraser.
Highlight your Paper3 layer.
Erase around the frame and elements
creating a soft edge.

Make a new layer on top of all layers.
Type the name you want in the font you want.
I used the eye dropper tool and chose a color from my tube's leggings.
I also used Stroke, 3, Center, Black.

Make another new layer.
Go ahead and use your font of choice for
Emo Friends Forever.
Here's how I did this.
Using Ashley Crawford font
I typed the letters EFF.
Then, still on that layer of text
I put my cursor between the letters E and F
then I switched my font to BaaBookHMK Bold
and typed “mo”.
Do this again starting with your cursor after the first F
and type “riends”.
And one more time starting after the last F
and typing “orever”.

Next, I highlighted the name layer.
Now right click.
In the menu that pops up,
Select “Copy Layer Style”
Highlight the EFF text layer.
Right click.
When the menu pops up
Select “Paste Layer Style”

MOST IMPORTANT!!
You must now do this:
Put the artist's name, website, and your license number
of the tube you used on the siggy!!
Add your name (ie: Designed by Your Name) behind this info.
Make sure this info is legible and clearly seen.

Save as PSD to maintain layers.
Then save as PNG, remembering to use a number behind your sig title.

YOU'RE DONE!!

I hope you had fun with this tut!
♥HUGS!♥

*This tut was created by me, Redneck Tuts by Savage. 
Any resemblance  to any other is purely coincidental.*
Artist: ©Alfadesire http://www.picsfordesign.com/ PFD_Savage

SUPPLIES NEEDED:
TUBE OF CHOICE: I used the awesome artwork of Keith Garvey. 
You must have a license to use his art.
You can find Keith's art and get your license HERE.

SCRAPKIT: Ms. Bunny Collab by Designs by Sarah and Pimp'd Designz.
This is 2 PTU kits in one. You can find it HERE. 
WORDART: Bunnies, WordArt by Savage.
This is my own WordArt.
You can get it HERE. 
FONT OF CHOICE: I used CupieDoll.

I used Photoshop for this tut.
♥♥♥♥♥♥♥

Because I am using two kits combined,
when you see: pd-***
That means the element is from Pimp'd Designz kit.
sb-*** is from Designs by Sarah kit.
The whole idea of Collab kits is to mix and match elements
from all the kits in the Collab.
So go nuts!
Have FUN!

Let's have some fun!
Open a canvas, transparent background, 650x650 pixels.
Open pd-frame05.
Place in center toward top of canvas.
Open sb-frame2.
Center on top of pd-frame05.

Ok. Now we're gonna do some work behind these frames.
Open sb-paper2.
Center behind both frames.
Grab your eraser and erase paper around the outside of the frames.
Open pd-print01.
Center this behind the paper.

These next few elements are placed on top of paper
behind frames:
sb-spray1
pd-sparkle01
sb-flower1

On top of the frames
I used these elements:
sb-ribbon1
sb-bow1
pd-swirl02
sb-rose
pd-charm01
pd-shoe
pd-bunny01
pd-bunny02
pd-bag
pd-flower01
pd-kiss
sb-fuzzy handcuffs

Place your elements wherever you like.
I added a drop shadow to the elements.

Open your tube and place where you like.
I placed my tube in front of the shoe
and added a drop shadow.

Open your WordArt.
Choice the WordArt you like.
Place this on your siggy.
I added a drop shadow.

When you're happy with your sig,
Make a new layer.
Type your name in the font of your choice.
I used the eye dropper tool
and clicked on my tubes stockings for color.
I then added Stroke, Outside, 3, black.

MOST IMPORTANT!!
You must now do this:
Put the artist's name, website, and your license number
of the tube you used on the siggy!!
Add your name (ie: Designed by Your Name) behind this info.
Make sure this info is legible and clearly seen.

Save as PSD to maintain layers.
Then save as PNG, remembering to use a number behind your sig title.

YOU'RE DONE!!
I hope you had fun with this tut!
♥HUGS!♥

*This tut was created by me, Redneck Tuts by Savage. 
Any resemblance  to any other is purely coincidental.*
Artist: ©Keith Garvey http://www.garvgraphx.com/ PTE0041
Friday, April 8, 2011

SUPPLIES NEEDED

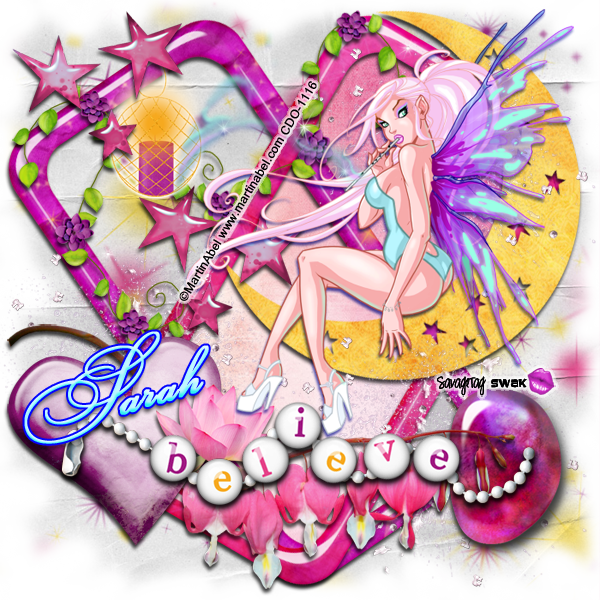
TUBE OF CHOICE: I used the awesome artwork of Elias Chatzoudis.

I used six different tubes of Elias.

You must have a license to use his art.

You can find Elias's art and get your license HERE.

SCRAPKIT: Emo Girls Rock Mix & Match Collab by Pimp'd Designz.

This is a PTU kit. You can find it HERE.

FONT OF CHOICE: I used:

Elias – Exmouth

Rocks – A bite

Any Questions? - BroadwayComD

I used Photoshop for this tut.

♥♥♥♥♥♥♥

Let's have some fun!

Open a canvas, transparent background, 650x650 pixels.

Open frame03. Center on canvas.

Open pp04.

Duplicate this layer and hide one layer for now.

Highlight frame03 layer.

Now grab your magic wand.

Click frame03 with your magic wand

until the entire frame has marching ants around it.

Highlight your visible pp04 layer.

*Go up and click on Select in your toobar.

Click Inverse.

Hit the Delete key on your keyboard.

Go back to Select.

Click Deselect.*

(We'll be repeating the steps marked * in this tut.

Please refer back to this when you see *.)

You now have a new color frame layer.

You can merge this down if you'd like.

Now we're going to put some things behind the frame.

Open pp01.

Highlight your frame layer.

Grab your magic wand.

Now click the upper left corner inside the frame.

Holding down the Shift key,

Click the lower right corner inside the frame.

Both these squares should now have “ants” around them.

Highlight pp01 layer.

Repeat * steps.

Open pp02.

Duplicate this layer.

Hide one layer.

Position the visible layer behind the frame in the lower left corner.

Play around with it until you like where the design is.

Highlight your frame layer.

Grab your magic wand and click inside the lower left corner.

Now highlight pp02 layer.

Repeat * steps.

Unhide and highlight your second pp02 layer.

Again, highlight the frame layer.

This time, use your magic wand inside the upper right corner.

Highlight your second pp02 layer.

Repeat * steps.

I used these elements behind the frame

but on top of the papers.

Print01 and 02

Glitter 1, 2, and 3

Wire

Next, I placed pd-frame-02 in the center of the frame.

Open pp06.

I used the magic wand on frame02.

Then highlight pp06 and repeat * steps.

Highlight the frame02 layer again.

Use your magic wand and click inside the top circle.

Unhide and highlight pp04, repeat * steps.

This is now ready for your tube placement.

We'll come back to this in a minute.

Open frame01.

Place it toward the bottom of your sig.

Open pp03.

Highlight frame01 layer.

Grab that magic wand.

Holding the Shift key down,

Click the inside of all four film frames.

Highlight pp03 layer and repeat * steps.

This is now ready for your tube placements.

Open your main tube and place it in the center of your siggy.

Now open your other tubes.

Play with the placement until you are happy with them.

A good way to do this is place them behind the frames.

That way, you can see what it will look like when you're done.

When you're happy with placement,

Highlight frame02.

Grab the magic wand and click inside that top circle.

Highlight your tube that goes there.

Repeat * steps.

While you're here, duplicate this tube.

Click on the first layer of this tube.

Right click, go to Blending Options.

Click Luminosity, 100%.

Highlight your second layer of this tube.

Right click again, Blending Options.

Click Screen, 100%.

Now go to frame01 layer, highlight it.

Magic wand, click on one open frame square.

(I start on the left and work my way toward the right.

Do whatever you are comfortable with.)

Highlight your tube layer that goes in that square.

Repeat * steps.

Do this for all four squares.

Ok. Now for each tube in frame01, do this:

One at a time, highlight the tube layer.

Right click, Blending Options.

Click Luminosity, 100%.

Your tube work in done.

Time to go nuts with the elements!

Play around!

This is the fun part!

Resize, duplicate and rotate any element you choose.

I used these and placed them behind my main tube:

border

notes

guitar

star01 and 02

sucker

ribbon

kiss

lipstick

I placed a drop shadow on my main tube only.

To make the elements stand out,

I used different colored Outerglows and Strokes.

When you're happy with your sig,

Make a new layer.

Now you will be doing the text.

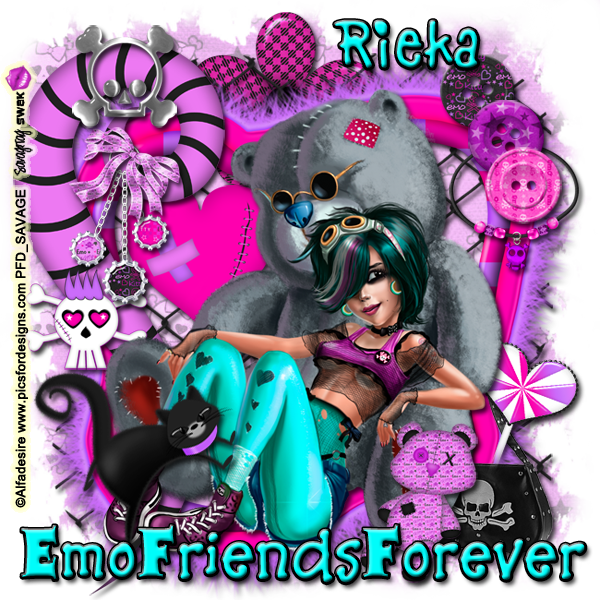
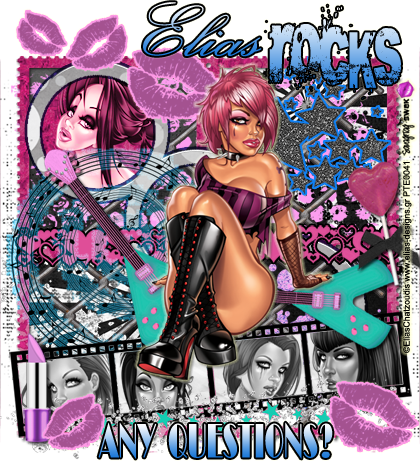
Use my sig as a guide.

I had three layers of text:

One for: Elias

One for: Rocks

One for: Any Questions?

I used a Gradient Overlay, Outerglow and Stroke.

Just play around til you're happy.

If you'd like, you can add a name.

MOST IMPORTANT!!

You must now do this:

Put the artist's name, website, and your license number

of the tube you used on the siggy!!

Add your name (ie: Designed by Your Name) behind this info.

Make sure this info is legible and clearly seen.

Save as PSD to maintain layers.

Then save as PNG, remembering to use a number behind your sig title.

YOU'RE DONE!!

I hope you had fun with this tut!

HUGS!

*This tut was created by me, Redneck Tuts by Savage.

Any resemblance to any other is purely coincidental.*

Artist: ©Elias Chatzoudis www.elias-designs.gr PTE0041

♥Tribute to Rieka♥

To honor Rieka and all she has blessed me with, I will be leaving all my tuts that I have written with her kits on my blog. They are not coming down. Even though her kits are no longer available, the tuts I wrote using them are my tribute to her. Hopefully, they will inspire you the way Rieka inspired me. Love You, Rieka! You'll be forever in my heart.♥

About Me

My Photo
Savage
Hi Ya'll! I'm Savage and I'd like to welcome you to Redneck Tuts. These are not your ordinary tuts, as they are geared toward those of us that don't have "working knowledge" of Photoshop or PSP. My tuts are all done in PS. They are designed to show you different techniques that you may not know. I hope you learn something that you can use in your creations in the future. Please, just have fun and put your own spin on these tuts. Be original and shine! Love Ya! ♥
View my complete profile

♥Luv is Nice♥

♥ Followers ♥

♥ Gotta Luv These! ♥

♥Awesome Tuts♥

♥My Faces♥

♥My Blog Awards♥