


♥ Follow Me ♥

♥Free Fonts♥


Wednesday, June 29, 2011

SUPPLIES NEEDED
TUBE OF CHOICE: I used the fantastic artwork
of Suzanne Woolcott.
You must have a license to use her art.
You can find Suzanne's art and get your license HERE.
SCRAPKIT: Girl Gurl by Jenny's Designz.
This is a FTU kit.
You can find it HERE.
FONT OF CHOICE: I used Cafe Rojo.
I used Photoshop for this tut.
♥♥♥♥♥♥♥
In this tut we'll be learning how to
recolorize elements and animate falling flowers.
If you don't wish to animate, just skip the steps marked *BLUE*
Open a canvas, transparent background, 600x600 pixels.
Open paper2.
Resize to 17% Height, 25% Width.
Center on canvas.
Open paper3.
Resize to 16% Height, 15% Width.
Position this so the top and right sides of the paper
are lined up with top and right sides of the siggy.
You should be able to see the border of
paper2 on the left and bottom of the sig.
Now grab a soft edged eraser.
Erase the bottom edge of paper3
so you can see the flowers on paper2.
Open paper4.
Resize to 45% Height, 42% Width.
With a soft edged eraser
Erase around the edges
so you can see the border of paper3.
Make a new layer.
Find your Rectangle Tool in your toolbar.
Mine is on the left of the screen
underneath the T (text) tool.
You may have to right click to show your options.
Select Rectangle Tool.
In your top toolbar go to Color.
This should be right there next to Style.
Click the Color box.
Use these settings:

Click OK.
With your Rectangle Tool:
Holding your left click down on your mouse,
Line up your tool with the top of the tag
starting over at the left of your siggy
next to the white border of paper2.
Drag the cursor toward the right
all the way over to the edge of the tag.
Still holding down the mouse
drag the cursor toward the bottom
of the siggy just a little bit
until you get a thin rectangle at the top.
Release your mouse.
Still on this layer,
Right Click in the Layer Palette.
Select Convert to Smart Object.
Right Click again.
Click Rasterize Layer.
You should have one thin rectangle at the top of your tag.
Duplicate this layer.
With the duplicated layer highlighted
place your cursor on your siggy.
Right Click.
Select Rotate 90% CW (clockwise).
Line this layer up with the right edge of your tag.
You should now have what looks like
a continual border around your siggy.
Still on your duplicated rectangle layer
Right click in the Layer Palette.
Click Merge Down.
Now your two rectangles are one layer.
If you are not going to animate,
skip the steps marked in *BLUE*
*Duplicate this layer.
Highlight the first rectangle layer.
Go to your toolbar and Click Filter.
Select Noise, Add Noise.
Use these settings:

Click OK.
Highlight your second rectangle layer.
Repeat the steps for adding Noise above
changing the number 30 to 35.
Click OK.*
Open fantacydust.
Center on canvas.
Duplicate this layer.
Right Click.
Select Merge Down.
This makes the dust more visible.
Open clouds.
Resize to 75%.
Center at bottom of canvas.
Open scattered mix.
Resize to 55%.
Place in upper left corner.
Open glitter cluster frame jenny.
Resize to 40%.
Center on canvas.
Now we will recolorize this to match our tag.
(It's ok. Jenny gives permission for this in her TOU.)
With this layer highlighted
Go to Image in you toolbar.
In the drop down menu
Select Adjustments.
In the next drop down menu
Click Hue/Saturation.
Use these setttings:

Click Ok.
Cool, huh?
Remember that next time you want
to recolorize something.
(Please make sure it's ok to do by reading
the designers TOU first.)
*Duplicate this layer.
Highlight the first frame layer.
Repeat the steps for adding Noise
changing the number to 15
and uncheck Monochromatic.
Highlight the second frame layer.
Repeat steps for adding Noise
changing the number to 18.
Open doodle.
Resize to 30%.
Flip 90% CCW (counter clockwise)
Place in upper left corner.
Open flowers.
Resize to 15%.
Place at bottom of siggy.
Open your tube.
Resize to your liking.
Place in center of canvas.
I placed a drop shadow on these layers:
my tube
flowers
doodle
cluster frame
scattered mix
Make a new layer.
Type your name on the taggie.
I used the color 950e6c.
Stroke 3, Outside, color ec9ffd.
Right click to Convert to Smart Object.
Then Rasterize Layer.
I put another stroke on the name layer.
Stroke 2, Outside, color f7f7fb.
Resize your taggie now to your liking.
MOST IMPORTANT!!
You must now do this:
Put the artist's name, website, and your license number
of the tube you used on the siggy!!
Add your name (ie: Designed by Your Name) behind this info.
Make sure this info is legible and clearly seen.
If you don't want to animate, Save as PNG.
YOU'RE DONE!!
(If you want to maintain your layers
Always Save as PSD first.
Then you can save it as a PNG.
When doing both these steps
It is important to change the title of the tag.
Example:
When I Save as PSD,
I always name the tag what I want.
Then, when saving as a PNG,
I add the number 1 behind the name of the tag.
Like this:
Unicorn Dreams, Save as PSD
Unicorn Dreams1, Save as PNG
Otherwise, your PNG will overwrite your PSD
Merging your tag into one layer only.)
**TO ANIMATE**
Open the Animation Window.
Set the time for .2.
For the first frame:
Show all paper layers
first rectangle layer
fantacydust
clouds
scattered mix
first cluster frame layer
doodle
flowers
your tube
your name layer
your copyright layer
Second frame:
Show all paper layers
second rectangle layer
fantacydust
clouds
scattered mix
second cluster frame layer
doodle
flowers
your tube
your name layer
your copyright layer
Here's the easy way to animate
the scattered mix layer.
In Frame 1 of animation window
place the scattered mix layer
where you want your animation to begin.
I placed mine in the upper left corner
with only the bottom flowers showing on the tag.
Now the second animation frame:
Move your scattered layer to where you
want the animation to end.
I placed this toward the lower right corner.
Ok. Here's the cool part. LOL!
Look underneath your animation frames.
See that toolbar down there?
In between the Play buttons
and the Duplicate Selected Frame icon
there is a nifty little icon that looks like
several small squares
running in a downward diagonal row.
If you hold your cursor over that
it will say
Tween's animation frames.
Click it.
A window will pop up.
Use these settings:

Click OK.
You now have 12 frames of animation.
Go ahead and hit Play.
Your scattered mix layer is now fully animated.
Now we just have to animate your rectangle
and Cluster Frame layers.
For all odd numbered frames:
The FIRST layers of rectangle & cluster frame should show.
Hide the second layers.
For all even numbered frames:
The SECOND layers of rectangle & cluster frames should show.
Hide the first layers.
DO NOT MESS WITH
YOUR OTHER LAYERS!
They're done.
TIP FOR OTHER CREATIONS:
When animating layers
In the first frame of animation
place the layer you are animating
where you want the animation to start.
In the second frame of animation
place the animated layer
where you want the animation to stop.
THEN use the Tween tool.
Save as PSD. Then Save for Web & Devises.
YOU'RE DONE!
I hope you had fun with this tut
and that you can use the fading technique
in other taggies you create!
♥HUGS!♥
*This tut was created by me, Redneck Tuts by Savage.
Any resemblance to any other is purely coincidental.*
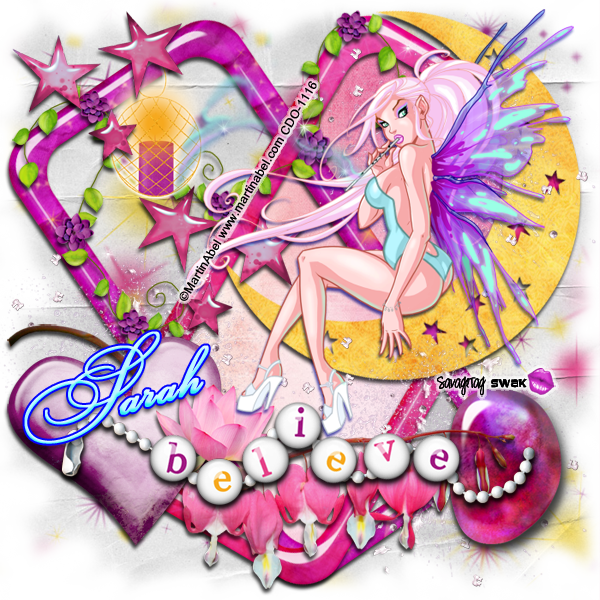
Artist: ©Suzanne Woolcott www.gorjussart.com SW6149
Tuesday, June 28, 2011
RIEKA HAS OPENED HER
OWN STORE!
Won't you please help Congratulate Rieka
on opening her own store.
It is my honor to be on her CT.
I am so excited for her.
Please stop in and visit.
It would mean much to me.
Just click the image below to go directly there.
♥Thank you!♥

I'm having 50% OFF sale on there now &
Got a FREEBIES that you can snag on my store too!!
Don't forget to sign up & subscribe to my Newsletter to get surprise pressie &
Coupon that you can use only at my store!!
Hope you all will enjoy your stay with me!
Happy Shopping everyones!! >.<
Got a FREEBIES that you can snag on my store too!!
Don't forget to sign up & subscribe to my Newsletter to get surprise pressie &
Coupon that you can use only at my store!!
Hope you all will enjoy your stay with me!
Happy Shopping everyones!! >.<
Monday, June 27, 2011
SUPPLIES NEEDED
TUBE OF CHOICE: I used the awesome artwork of
Elias Chatzoudis.
You must have a license to use this art.
You can find Elias's art and get a license HERE.
SCRAPKIT: Pretty in Punk by Designs by Sarah.
This is a PTU kit.
You can find it HERE.
FONT OF CHOICE: I used BattleLines.
I used Photoshop for this tut.
♥♥♥♥♥♥
Let's have some fun!
Open a new canvas, 700x700.
Transparent background.
Use my taggie as a guide for placement of elements.
Open Frame 1.
Center on canvas.
Open Paper 2.
Place behind Frame 1 layer.
Highlight frame layer.
Grab your magic wand.
Click inside frame 1.
Highlight paper layer.
Go to Select in your toolbar.
Click Inverse.
Hit the Delete key on your keyboard.
Go back to Select.
Click Deselect.
With paper layer still highlighted
Go to the upper right corner of your Layer Pallete.
Set the Opacity to 20%.
Open Frame 3.
Center toward bottom of canvas.
Open Frame 2.
Center at top of taggie.
Between Frame 1 & Frame 3
I placed these elements:
ribbon 1
glitter 1, resize to 50%
print 2
flower 1, centered in Frame 2
Open your tube.
Place her behind Frame 3.
Duplicate this layer.
Place the duplicate on top of all layers.
Grab an eraser.
Erase this tube so the frame shows
like in my taggie.
Between Frame 3 & Frame 2
I used these elements:
pocket, duplicate layer
(resize one pocket to 35%
one pocket to 25%)
button 1 & 2, resize to 50%
barbed wire 2
(Erase the portion of barbed wire 2
that covers the buttons,
leaving the barbed wire showing
in center of button to make it look like
the buttons are sewn into the wire.)
flower 5, resize to 35%
flower 3, resize to 25%
heart 1
heart 2, resize to 75%
stars 1
When you are finished placing the elements
Your duplicated tube layer should still be the top layer.
Resize your taggie to your liking.
Make a new layer.
Type your name.
I used Black.
Stroke, Outside, 3, color fe03ba.
MOST IMPORTANT!!
You must now do this:
Put the artist's name, website, and your license number
of the tube you used on the siggy!!
Add your name (ie: Designed by Your Name) behind this info.
Make sure this info is legible and clearly seen.
Save as PSD to maintain layers.
Then save as PNG, remembering to use a number behind your sig title.
YOU'RE DONE!!
I hope you had fun with this tut!
♥HUGS!♥
*This tut was created by me, Redneck Tuts by Savage.
Any resemblance to any other is purely coincidental.*
Artist: ©Elias Chatzoudis www.elias-design.gr PTE0041

SUPPLIES NEEDED
TUBE OF CHOICE: I used the awesome artwork of Keith Garvey.
The tube I used came with three different sizes
including two Close Ups.
I used all three sizes.
You must have a license to use this art.
You can find Keith's art and get a license HERE.
SCRAPKIT: Tickled Pink by TammyKat Designs.
This is a PTU kit.
You can find it HERE.
FONT OF CHOICE: I used Some Weatz Swashes.
I used Photoshop for this tut.
♥♥♥♥♥♥
Let's have some fun!
Open a new canvas, 700x700.
Transparent background.
Use my taggie as a guide for placement of elements.
Open grungypaper 5.
Center on canvas.
Open rippedframe.
Center toward top of canvas.
Open frame 4.
Place toward bottom of canvas.
Open halftonpaper2.
Place this behind rippedframe.
With this paper layer highlighted
Go to the upper left corner of the Layer Palette.
Click the down arrow next to the word Normal.
Select Pin Light.
Grab an eraser.
Erase paper so none shows outside of rippedframe.
Behind frame4, place these elements:
bg1
brickbg-pink, resize to 75%
In upper right corner of Layer Palette
Set Opacity for brickbg-pink to 50%.
Center these layers inside frame4.
On top of frame4
I placed splash, resized to 50%.
These elements I used on top of rippedframe layer:
skullcharm2, resize to 75%
bowblack, resize to 50%
(duplicate this layer and flip Horizontally)
lollypink1
lollyblack2, resize to 75%
lollypink1, resize to 50%
hotword, duplicate and rotate second layer
sexyword
(hotword and sexyword layers are on top of all layers)
Open your regular sized tube.
Position where you like.
You may have to resize your tube to fit.
I resized mine to 80%.
Place this on top of rippedframe.
I also placed it behind hotwords & sexyword layers.
Ok. Ya ready to play?
We're going to be playing with your Close Up tubes.
It may look messy for a bit
but we'll clean it up so it looks good.
Open your Close Up tubes.
Make sure all Close Ups are behind rippedframe.
Play around with placement
and the different sized Close Ups.
Get them positioned as you like.
If you're having trouble visualizing the end result,
just hide the Close Up layers you're not playing with.
When you get them where you want them
you'll want to grab a soft edged eraser.
Layer by layer, one at a time,
erase the parts of each tube
that overlaps onto another.
Start with the bottom tube layer
and work your way up through all the layers of tubes.
Like this:
Highlight the bottom tube layer.
Hide all tube layers except bottom and next tube layer.
With the bottom tube layer highlighted
erase the part of that tube that is covered
by the second tube layer
and any part that goes outside rippedframe layer.
Unhide the next tube layer.
Highlight your second tube layer.
Again, erase the part of tube layer2
that is covered by tube layer 3
and extends outside rippedframe layer.
Keep repeating these steps until all tube layers are done.
Now for Blending Options.
I will tell you the Blending Options
I used on each Close Up layer.
To find these options,
go to the upper left corner of the Layer Palette.
Click the down arrow next to the word Normal.
For the lower left corner tube – Soft Light
Upper left corner tube – Screen
Upper center tube – Screen
Upper right corner tube – Darken, Opacity 75%
Lower center tube – Screen
Opacity setting for all Close Up layers
is set at 100% except the Darken layer.
Opacity settings are located
in the upper right corner of the Layer Palette.
Highlight grungypaper5 layer.
Grab a soft edged eraser.
Erase paper around the edges
creating a soft edge around your entire tag.
Place drop shadows on your taggie.
Resize your taggie to your liking.
Make a new layer.
Type your name.
I used White.
Stroke, Outside, 3, color fd06c6 .
MOST IMPORTANT!!
You must now do this:
Put the artist's name, website, and your license number
of the tube you used on the siggy!!
Add your name (ie: Designed by Your Name) behind this info.
Make sure this info is legible and clearly seen.
Save as PSD to maintain layers.
Then save as PNG, remembering to use a number behind your sig title.
YOU'RE DONE!!
I hope you had fun with this tut!
♥HUGS!♥
*This tut was created by me, Redneck Tuts by Savage.
Any resemblance to any other is purely coincidental.*
Artist: ©Keith Garvey www.garvgraphx.com PTE0041
Subscribe to:
Posts
(Atom)
About Me

- Savage
- Hi Ya'll! I'm Savage and I'd like to welcome you to Redneck Tuts. These are not your ordinary tuts, as they are geared toward those of us that don't have "working knowledge" of Photoshop or PSP. My tuts are all done in PS. They are designed to show you different techniques that you may not know. I hope you learn something that you can use in your creations in the future. Please, just have fun and put your own spin on these tuts. Be original and shine! Love Ya! ♥


